Showing posts with label pretty packages. Show all posts

Wednesday, October 24, 2012

October Birthday


It's time for another birthday for my friend who loves purple.  This year I found a simple chip-wood box and painted it with a lovely purple metallic paint. (One of my new favorites!) drilled a hole in the middle of the lid and added the over-sized matching silk flower.  Then I filled if with lots of sparkly goodies for her to enjoy on her birthday.  I added a multiple layered tag with a special message just for her.


I found this bin of cool keys at Micheal's and purchased one to add a simple decoupaged message on the side. She can hang it on her Christmas tree or next to her bed to remind her that she hold's the key to her dreams.


Have a great day.  I'll talk to you again soon.

Friday, June 8, 2012

Tea party gifts

As promised, here's what was inside the gift bags that I gave to my mom, sister and nieces.  Every year we have a birthday tea and I make them each a little gift.

This year I decided to put together small sewing kits, since my sister is leaving for a year to live in Ireland (I know lucky huh!) and she isn't taking her sewing machine I figured she'd need something for quick fixes.  One of my niece's lives in another city going to college and the other works in an office and can put it in her desk for emergencies.  My mom is a great seamstress so her's is just something pretty to put by her chair to hold extra pins and what-nots. So here's what I did.  I used the little half pint mason jars, I didn't want them to be too big or take up too much room.  Of course each one had to be colored coordinated.


Here's a peek inside.
Lid off, everything fits snugly inside
There is a small container with buttons and safety pins, a seam ripper, measuring tape, scissors with cover, a wooden spool with thread, a thimble, and a felt needle book


This is the inside of the needle case with a holder for a needle threader.
I painted all the metal pieces to match cause we all know I'm crazy for how things coordinate!  I found some very cool metallic paint and painted the thimbles and needle threaders.  I wish I could have done something with the scissor handles but I had to give in on that one.  My inspiration for the needle books came from here.  My sister's, of course, had shamrocks instead of flowers.

Well, there you have it another yearly tea gift.  But. our next one will be much later, we have to wait till sis get's back.  Have a great weekend everyone.  I'll talk to you again soon.

Thursday, June 7, 2012

June pretties

It's June and time for our annual Birthday Tea at the St. James Tea room.  I've been working on my gifts for my mom, sister and nieces.  The packages are all dressed and ready to go.


I'll share what's inside of them tomorrow.  Right now, I'm off to have tea.  Have a wonderful evening!  I'll talk to you again soon.


Thursday, May 24, 2012

May highlights

Today was the last day of school for this school year.  I think I can finally breath a sigh of relief.  This past month has been a bit frantic with all the end of the school year activities and graduations and fun family celebrations, May has been a whirl.  I did get some craftiness done and photographed and with a sweet new camera to break in I did a lot of photography.  So here are some of the highlights from the month (so far).
 Some quick thank you gifts for my library volunteers.  They really outdid themselves this year.  I would not have gotten half the things done that did get done without them.  Inside the tags there were gift cards too.
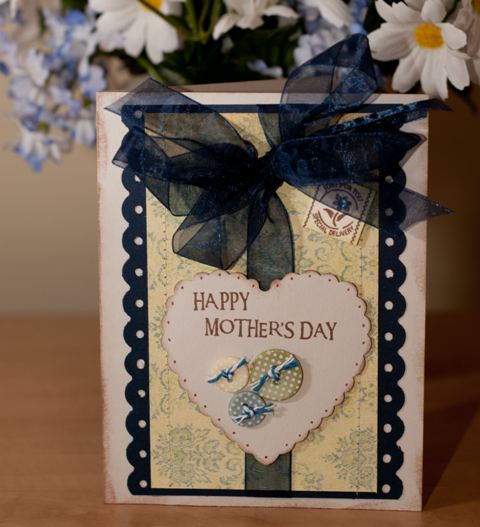
I filled the cups with a few goodies just for them and some they could share with their kiddos.  Next, I had a friend who was celebrating mother's day with several female family members and wanted to give each one of them a handmade card.


Yep there's more....


Almost done.....


Whew!  Got'em done just in time.  Then I made my mom's card but I didn't get a picture of that one.
I did several photo shoots this month and have a couple more before the end of the month gets here.

Mr. M and sweet Miss B.  It was my first time photographing an infant and young children, I had a great time.
I attended a photography workshop with my friend Sara.  We had so much fun and learned a lot too.
A shot of the "super moon" over the Sandia mountains.  And finally, I've been busy in the kitchen trying to get fresh fruits and veggies into my sweet DH.   My latest was a version of a cobb salad.  It tasted as good as it looked.
Well, there they are, a few of the highlights of the month so far.  It's been hard to get to the computer to up date everyone so I apologize for the length of this post.  But, summer break is upon us so I'm hoping to get caught up and back to a regular schedule again.  I hope you've had a great week and I'll talk to you again soon.

Monday, January 9, 2012

DIY Valentine Gifts


I've been creating away in my little studio the last few days and thinking of Valentine's day.  I wanted to make a sweet little container for a gift idea I had so I searched around the net for some ideas and found this site here.  This candy box is what I had envisioned but I assembled mine a little differently and I just used card stock because that's what I have on hand.  I made some coordinating felt flowers and a little tag to decorate the top.  Tucked inside is a little surprise.


I found the idea for the bracelet on-line too.  Right here, she even gives a great tutorial I how she makes them.  I did mine a little different, I'm not that good with nail polish.  I sprayed the candy (yes they're real conversation hearts) with several coats of clear lacquer, let them dry and then drilled the top and inserted the eye pins.  I had to warn the sweet-toothed DH not to eat them, they look even yummier shiny.  Not to worry, I'll be sure to give him his own little box of un-lacquered ones to eat on Valentine's day.


I had several folks at school ask me to make some for them to give as gifts so I'm off to make more.  I'll talk to you again soon.


Linking to:

Sunday, January 8, 2012

Packages and twine


Happy New Year! 8 days late! I can't believe how easily and quickly the days have been slipping by.  I've been busy crafting in the little studio I just need  time to get the camera out to take pictures, then I'll post some of my projects.  Until then, I received some new baker's twine this past week and have had fun wrapping up some simple packages to put in the mail.  All the new colors are so fun and you know how I love to coordinate my colors!

I'll talk to you again soon.


Monday, October 24, 2011

Halloween treats

 I had seen these cute little peppermint patty spider treats on a site some time ago and thought they would be cute to make for the staff for the start of conferences.  Our fall conferences coincide with the Halloween holiday.  I'm in the process of constructing 97 of these little guys.  They'll have a little tag hanging from one leg that reads: "Hope your conferences are filled with lots of treats and no tricks." 

However, in the past, the thought of making these by punching out all the different pieces with several different size punches made my wrist and thumb start aching just thinking about it.  Enter the new little paper crafting hero from Close to my heart... The Art Philosophy cricut cartridge.  All the pieces for these critters can be cut using that cartridge! No punches necessary, except for a standard single hole punch, for the small black pupils.  Even the legs are from the cartridge and I loved being able to cut just the right size to layer everything, as well as cut different size circles based on the diameter of my candy pieces.  So versatile!
These little treats were also inspired by the Heart 2 Heart challenge blog.  This week's challenge: Halloween or Fall.  You should head over there and see all the wonderful inspiration.  The papers for this project are all from Close to my heart, Hydrangea, black, daisy white and one of my favorite greens of all times, citrus leaf.  The shapes are: Scalloped circle, photo corners base and layer, and a plain circle.  For my purposes it was easy to load my paper, choose my shape, set the size and then auto fill the page.  The cricut maximized my paper and did all the cutting for me.  Now if it could just use glue dots I'd be set (ha, ha).

Have a great week and I'll talk to you again soon.  (If my post looks a little off it's because my motherboard died on my computer and I'm using my DH machine, he doesn't any photo editing software on his, but I'm grateful I could still participate this week!)  Oh, the original site were I found these little guys is here.

Friday, October 14, 2011

Baby gifts

Four new little ones are due in the next few weeks so it was time to put together their gifts.  These new little ones are made honorary Ravens and they get the t-shirt to prove it.  This year I wanted to package them up a little different so I found some baby bottles and rolled the shirts up really tight and slipped them inside the bottles.  Then decorated the top of the bottles with a tulle bow, silk flowers and a coordinating binkey.  I added a tag with a quote by Robert Munsch from his picture book, I'll love you forever.  The mom's to be really seemed to liked them.
The stamp set, and inks are all by Close to My Heart.  I pieced the tag image with a few scraps and colored the rest of it in with colored pencils.  Then I masked the whole image and sponged around it with CTMH Sky blue ink.  Thanks for stopping in today.  I'll talk to you again soon.